Last summer I was given a Celestron C8 optical tube assembly (OTA) in partial payment for some freelance coding work (I wrote an ASCOM driver for a product development effort). It wasn’t until this spring after returning from some winter travel that I’ve been able to take the time to set it up for imaging. This is not the EdgeHD version of the C8, but rather the “classic” f/10 version. I didn’t have another scope (aside from the OTA from my Celestron NexStar 6SE, perhaps) that was really suitable for galaxy season, so I was excited to put it into use. Its first image did not disappoint.
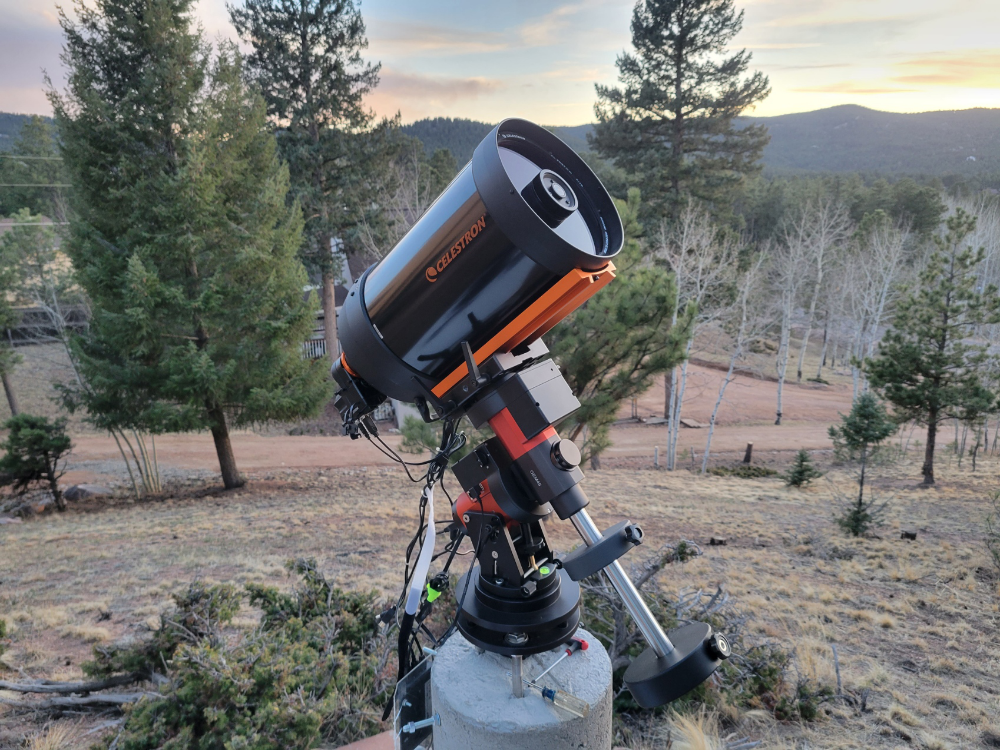
It took a bit of work over the past several months to get the C8 ready for action. When I received it, it was a bit on the dirty side–especially the corrector plate, which had a film of some sort on the inside. I pulled off the corrector plate and gave it a cleaning but left the primary and secondary mirrors alone, as they didn’t seem dirty enough to warrant a cleaning. I also needed to fit the C8 with a new dovetail–I wanted to replace the Vixen dovetail with a Losmandy-style dovetail, which works best with my GEM45 mount. Finally, I transferred the Celestron focus motor over from my NexStar 6SE OTA, because astrophotography without being able to autofocus is just not worth doing.
Knowing that this scope would exhibit some coma at its native focal length, I decided to purchase the Starizona SCT Corrector IV, which purports to nearly eliminate the coma (and provide a shorter effective focal length which is probably more suitable for astrophotography). Starizona’s web page for the corrector claimed that the C8 is actually closer to f/11 than the stated f/10, and that the focal length of the C8 with the corrector would be about 1450 mm. That’s still nearly triple the focal length of my Sky-Watcher Esprit 100ED refractor. Wow. I also purchased an adapter for the Starizona corrector that would make it much easier to get my camera sensor at the proper back focus distance (90.3 mm) for the corrector. The adapter takes up 35.3 mm of the back focus, leaving 55 mm which is a more common back focus distance and easily done with the equipment I already had (my ASI533MM Pro camera, ZWO off-axis guider, and ZWO mini filter wheel):
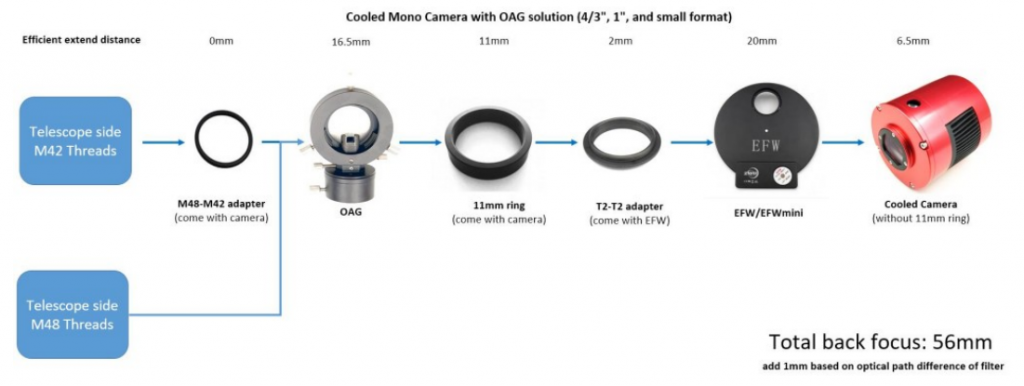
The diagram above actually indicates 56 mm, not 55, because it accounts for the optical thickness of the filters. Starizona actually says on their web page that plus or minus a couple mm of back focus is just fine for their SCT Corrector, anyway.
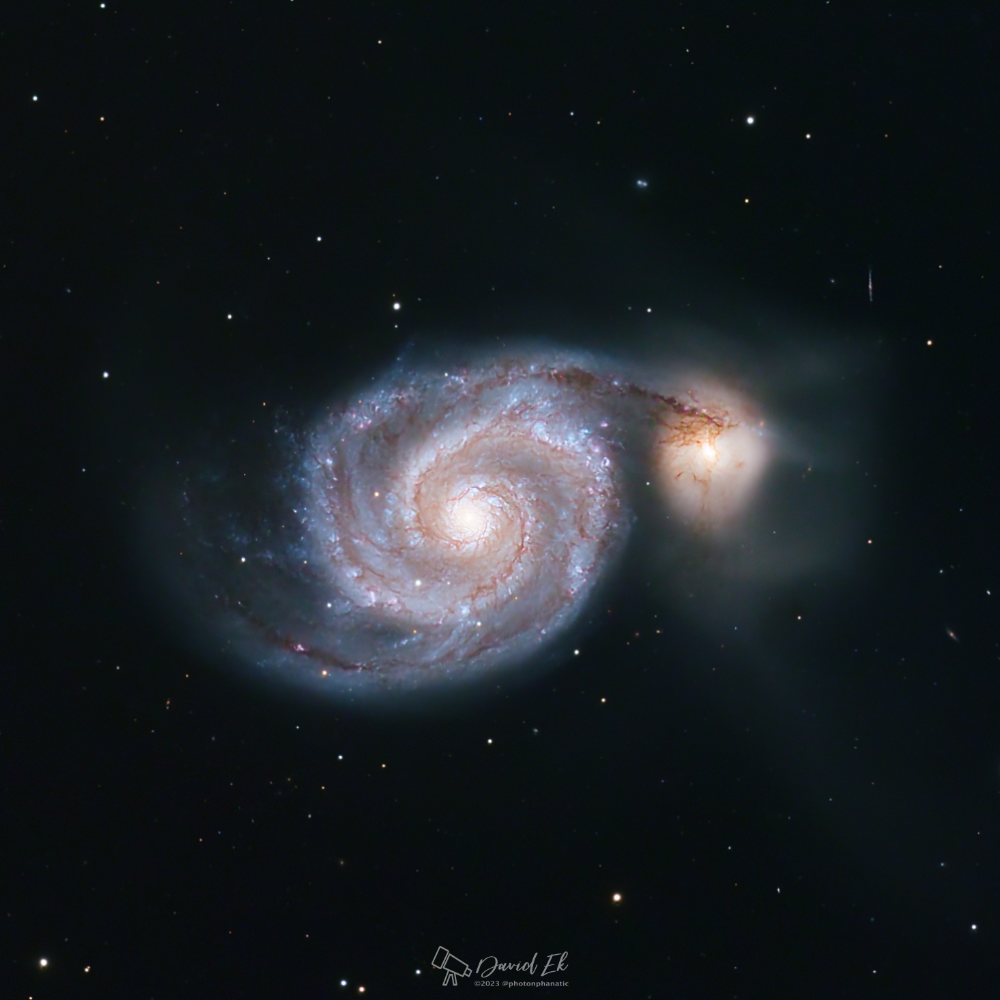
For my first go at imaging with the C8, I chose to target the Whirlpool Galaxy (M51) which is high in the sky for most of the night in the springtime here at almost 40 degrees N latitude. I spent part of the afternoon getting the scope set up and balanced and roughly focused using a distant ridge line as a target. I wanted to find both the visual focus point as well as the focus point when outfitted with camera, off-axis guider, and filter wheel. I rarely pop an eyepiece into one of my telescopes but in this case I needed to check the C8’s collimation once it got dark.
Once it got dark, I used a star diagonal and a 12-mm illuminated-reticle eyepiece to check collimation. I feared the worst, since I had removed and then replaced the corrector plate, but collimation was close enough that I didn’t think I could improve it, so I replaced the diagonal and eyepiece with my imaging train and started setting up for an imaging run. Autofocusing was a bit of a challenge, and I tweaked the autofocus settings in N.I.N.A to reduce the step size, which helped. It seemed that the autofocus routine had trouble dealing with the out-of-focus “donuts” from an SCT.
I was also concerned about how the OAG would work at longer focal lengths. Indeed, the image from the ASI290mm mini guide scope in PHD2 only showed a few stars from which to choose for guiding. Thankfully, those were sufficient for the evening. I’m not sure if this will be a problem with other targets. Tracking was as good as 0.4 arc seconds RMS during cloud-free periods.
The biggest challenge of the evening proved to be not equipment, but clouds. The forecasts indicated it would be a clear evening, but occasional clouds drifted across the target for the first hour or so. After that I was able to image for a couple hours before clouds again arrived and ruined the rest of the imaging run.
I shot in monochrome with Optolong LRGB filters as well as a 7-nm H-alpha filter, 5 minutes per sub. I ended up with 33 usable subs–12 L, 6 R, and 5 each for G, B, and H-alpha. PixInsight did a fabulous job of stacking the subs, as usual, and it didn’t take more than a couple hours to produce the image above. Russell Croman’s incredibly useful suite of XTerminator tools (StarXTerminator, NoiseXTerminator, and BlurXTerminator) greatly simplified the processing of this image.
Finally, I was curious about the actual focal length of this imaging setup (the C8 and corrector). Astrometry.net is a website that will plate-solve an image that you upload, and will also report some information (arc seconds per pixel) that can be used to calculate your actual focal length. So I uploaded one of my subs and Astrometry.net reported that the image had a resolution of 0.528 arc seconds per pixel. I fed that into a formula that I found on the Light Vortex Astronomy website and got an answer of 1469 mm–pretty close to the 1450 mm estimated on the Starizona corrector web page.
Overall I was pleased with my first effort at imaging with the C8. The image is sharp and clear and the stars are round. I’m looking forward to my next opportunity to use this scope.