The Pelican Nebula, IC 5070, imaged with a color camera and L-eXtreme filter
Opportunities for imaging seem to be sparse here in the summertime in the Colorado mountains. The short nights and afternoon and evening clouds make for a tough combination, and it always seems like when the sky is clear, the moon is high and bright. So I was thankful for a couple clear nights near the new moon during which I could collect a few photons from afar. I’d been waiting for an opportunity to give my new Sky-Watcher Esprit 80ED refractor a try. I’ve had it for a couple months now but this would be its first light.
It’s been mostly yucky weather since we returned home from AZ in mid-April, but I had a window of opportunity a couple nights ago–clear skies with a bright but manageable moon (waxing gibbous but decently far south). This allowed me to shoot a northerly target, NGC 4236 (also known as Caldwell 3). This is a Magellanic barred spiral galaxy in the constellation Draco. I shot this with my C8 (with a Starizona SCT corrector/reducer for a net focal length of 1470 mm) on an iOptron GEM45 mount, using an ASI533MM Pro camera and Optolong LRGB filters. I was only able to capture about 4.5 hours of 5-minute exposures, but it was enough to produce the image above. Processed using PixInsight and Affinity Photo.
This is probably not the most spectacular-looking galaxy out there, but I hadn’t shot it before and it was in the right place in the sky so I could shoot it all night and not suffer interference from the moon.
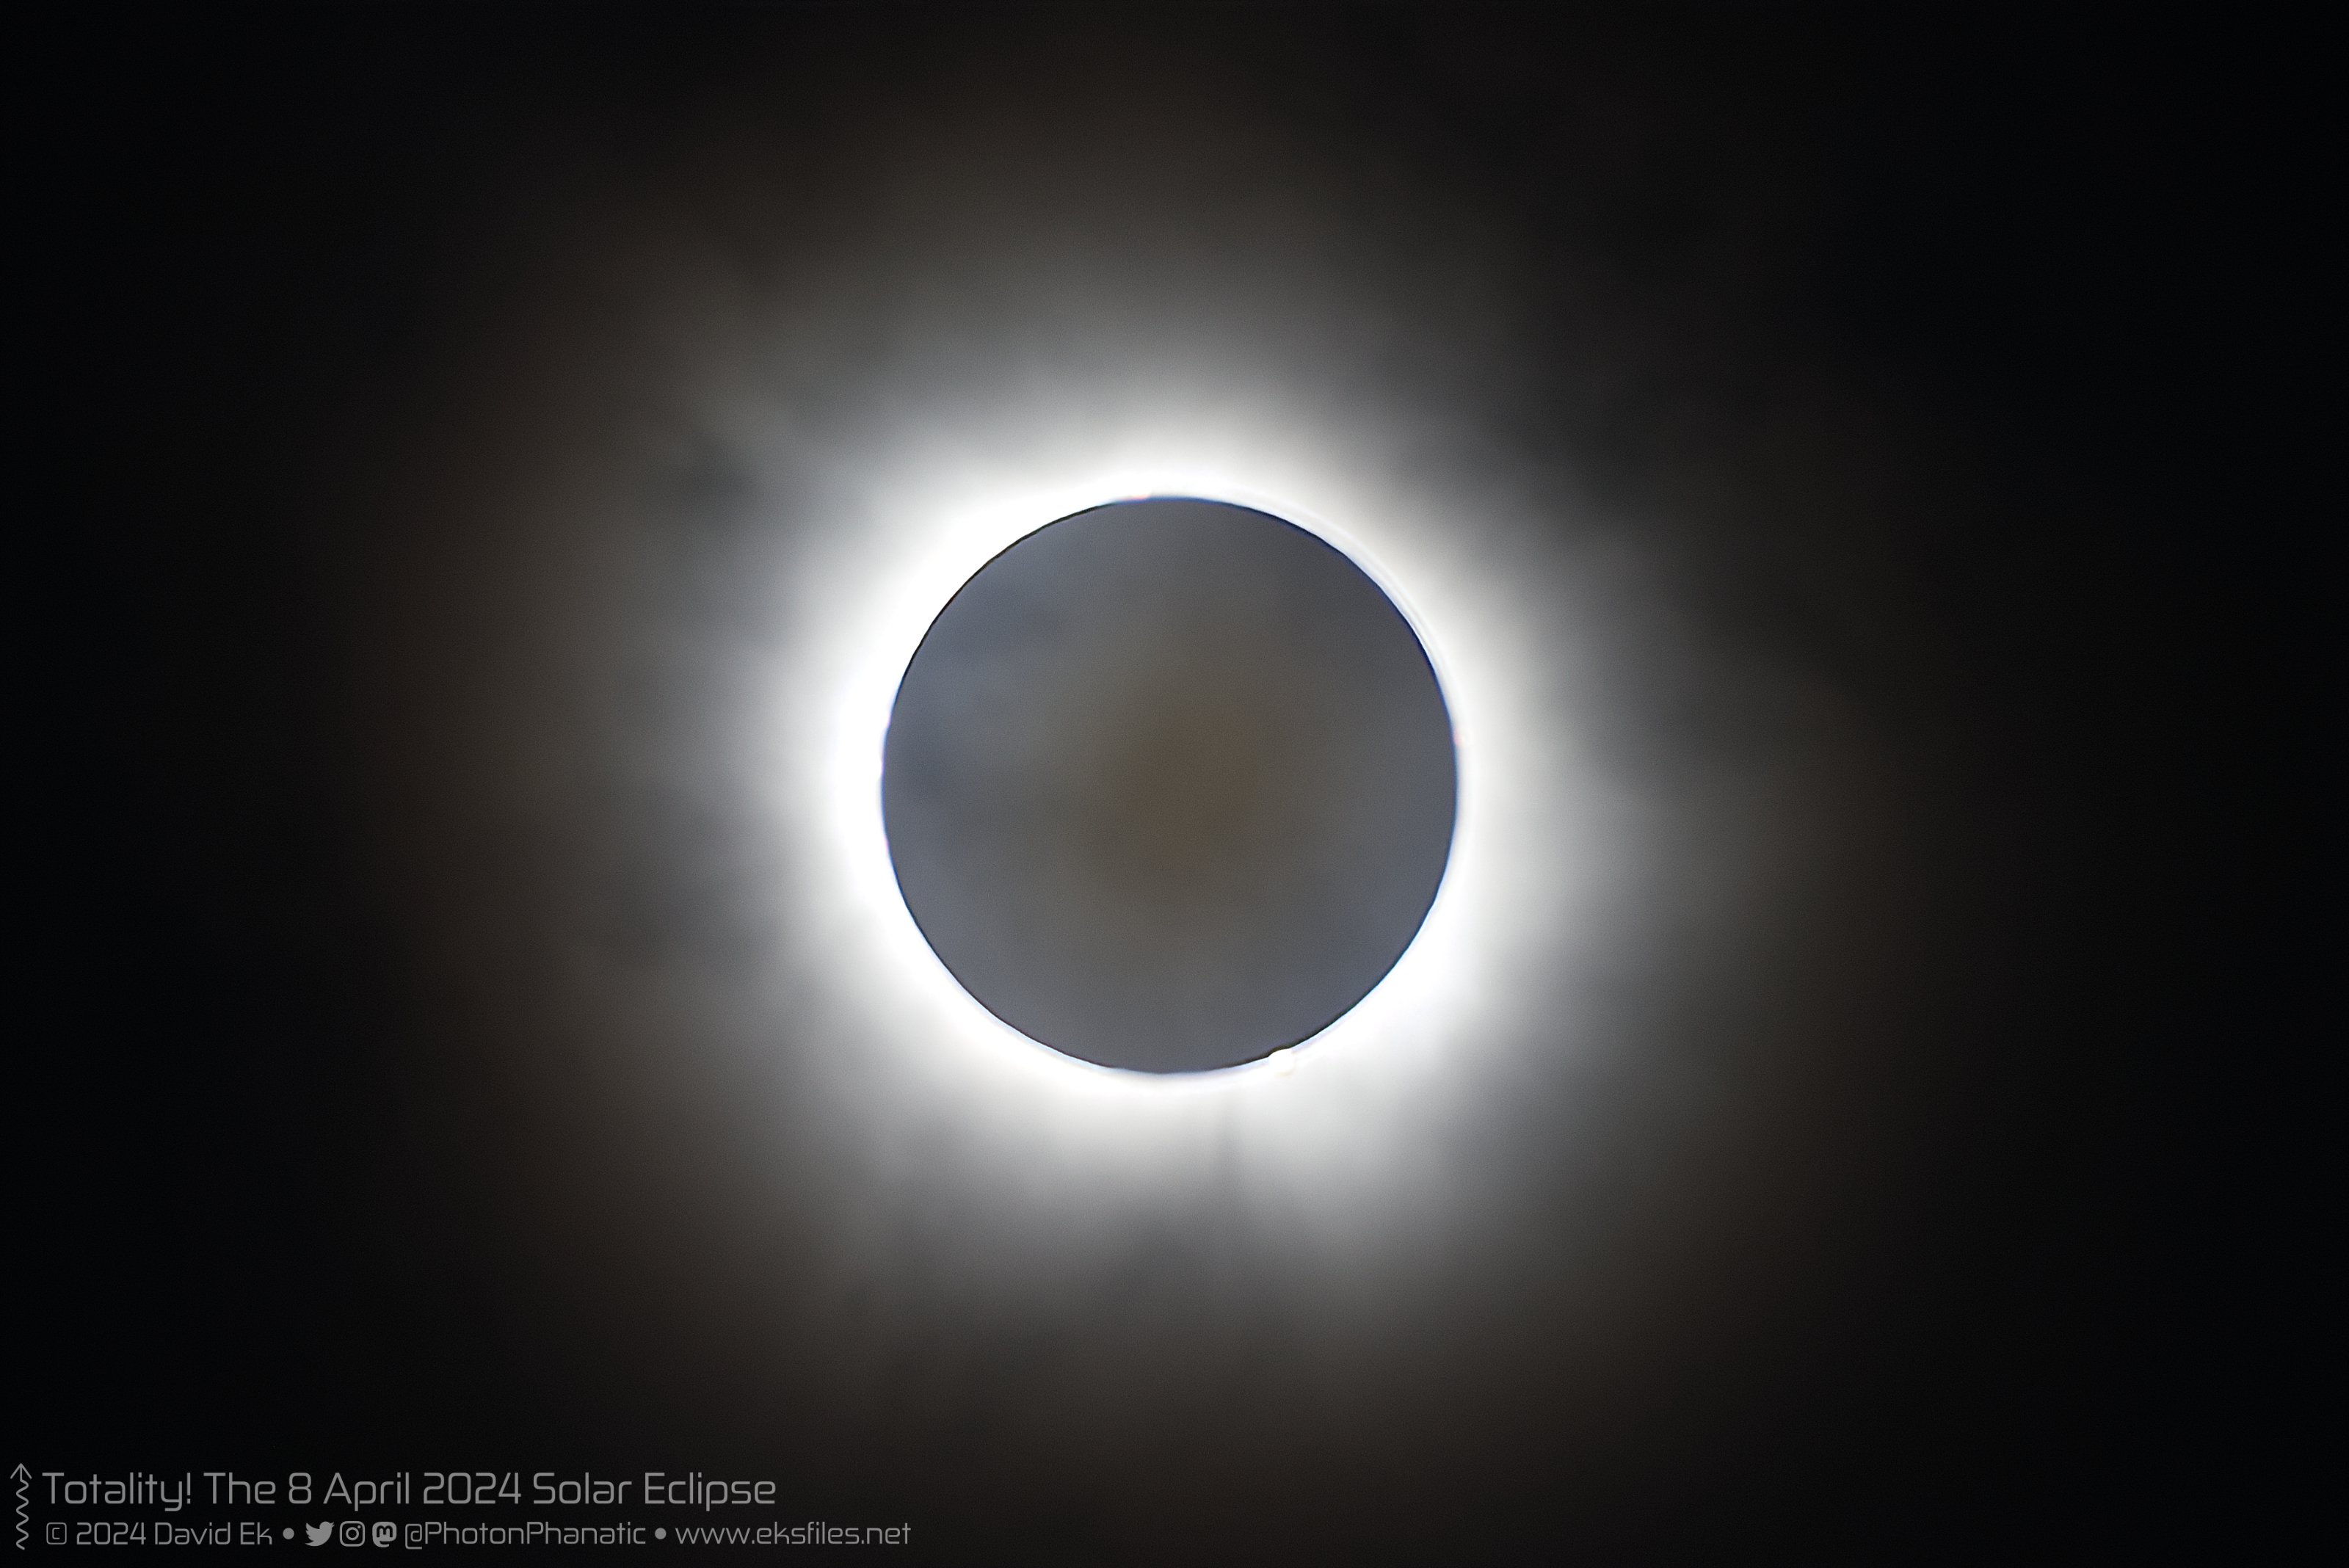
My wife and I traveled to TX in hopes of witnessing this year’s total solar eclipse. We were lucky to find a spot to park our RV right in the path of totality, and we were able to witness four minutes of totality. Clouds were a constant presence from the start of the eclipse up to moments before totality, but we lucked out and they parted enough to give us a great view.
I shot this image using a Canon EOS 250D DSLR and Tamron 18-400mm zoom lens set at 400mm. ISO 200, 1/10 sec, f/6.3. The focus could have been better. I’ll try harder next time.
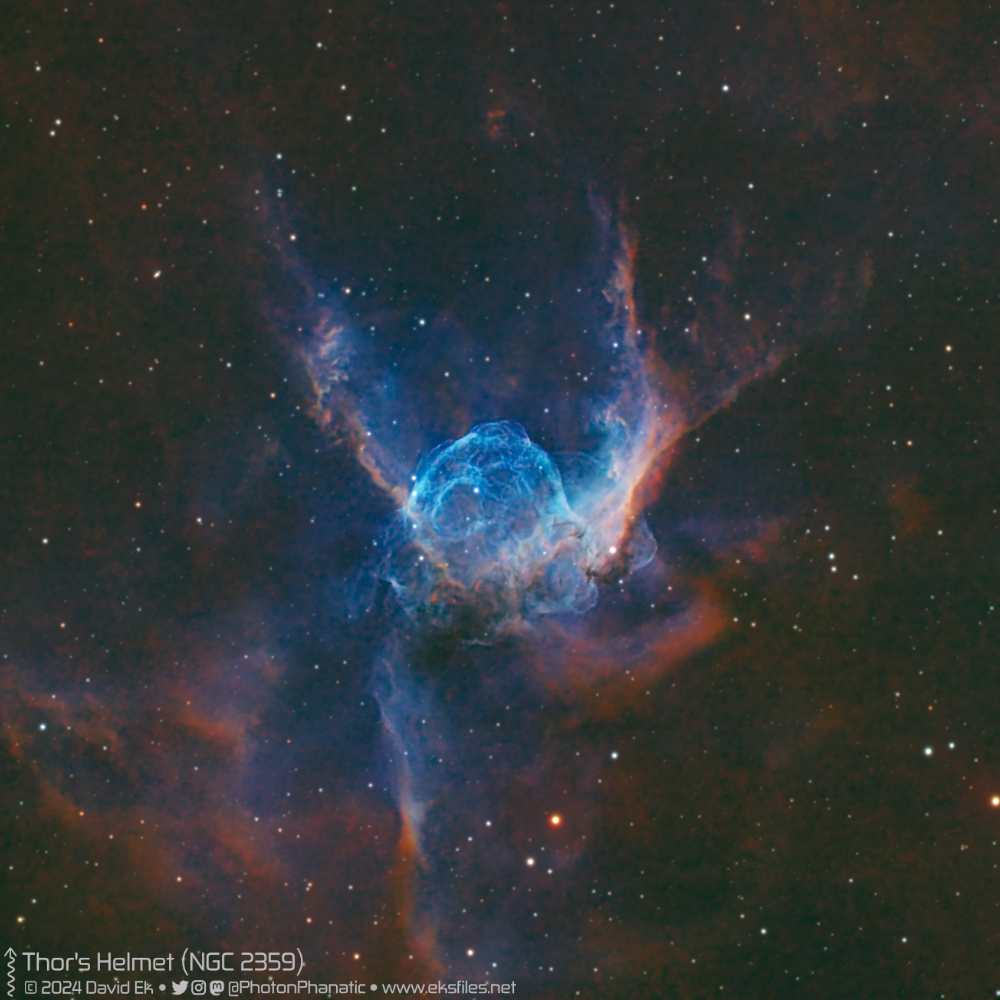
Thor’s Helmet is an emission nebula about 12,000 light years distant in the constellation Canis Major. I’ve always thought this was a cool-looking nebula and I wanted to give it a try with my imaging gear. Being in southern AZ for a few months this winter, it seemed like a good time to try it since it’s a southern target. I would have preferred to shoot this using my C8, but it didn’t make the trip to AZ with me. The best I had to work with was the optical tube assembly (OTA) from my Celestron NexStar 6SE, which I installed on my iOptron GEM28 mount for this shot. I thought I was prepared for a couple nights of decent imaging, but Murphy had other plans.
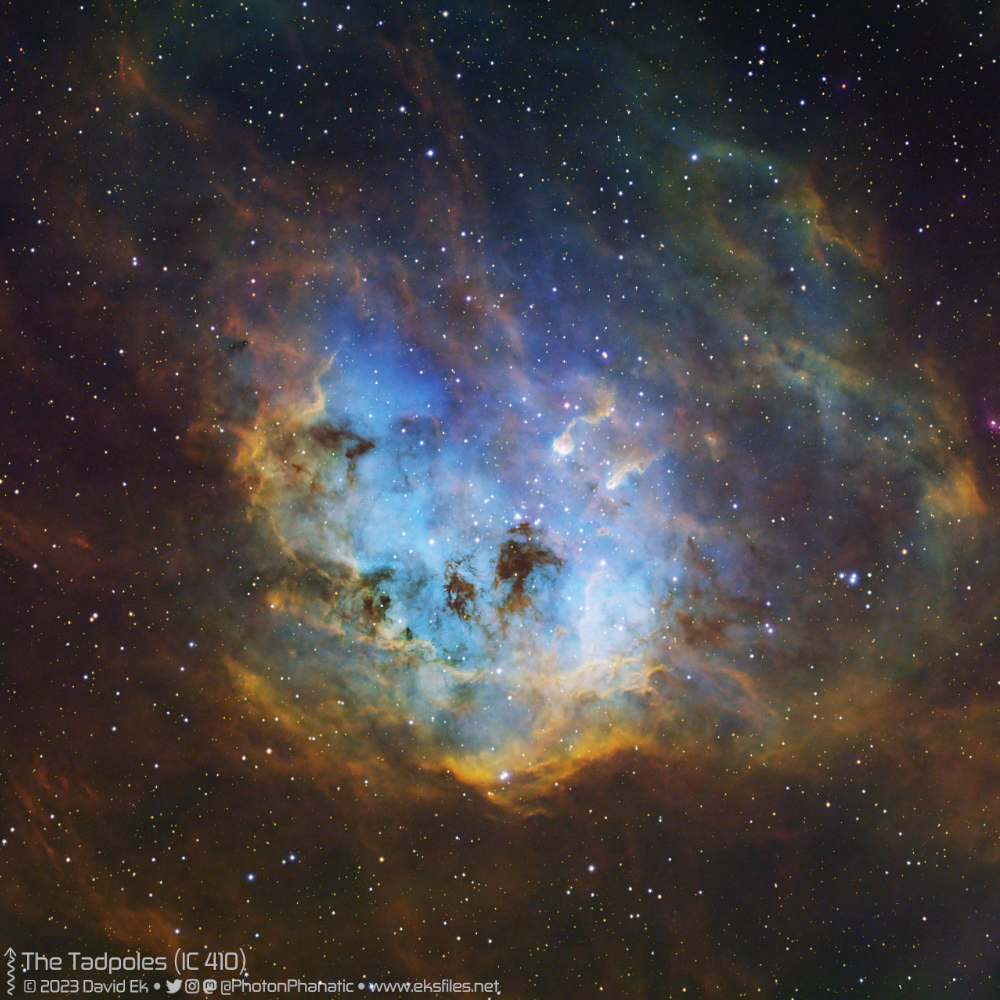
I shot the Tadpoles a few evenings ago when the skies were clear and the moon was minimal. We’re still snowbirding in AZ so I shot this from our RV park with my portable setup–a Sky-Watcher Evolux 82ED refractor (and matching 0.9x reducer/flattener) with an ASI533MM Pro camera, Optolong filters for Ha, SII, and OII as well as RGB for the stars, all on an iOptron GEM28 mount. This image was processed in SHO (the Hubble palette) with RGB stars. I’m pretty pleased with how this image turned out, especially considering the modest equipment used. It’s about 20 hours or so of data total, including the RGB I shot for the stars. The RGB required special attention due to flaws the Evolux 82ED optics.
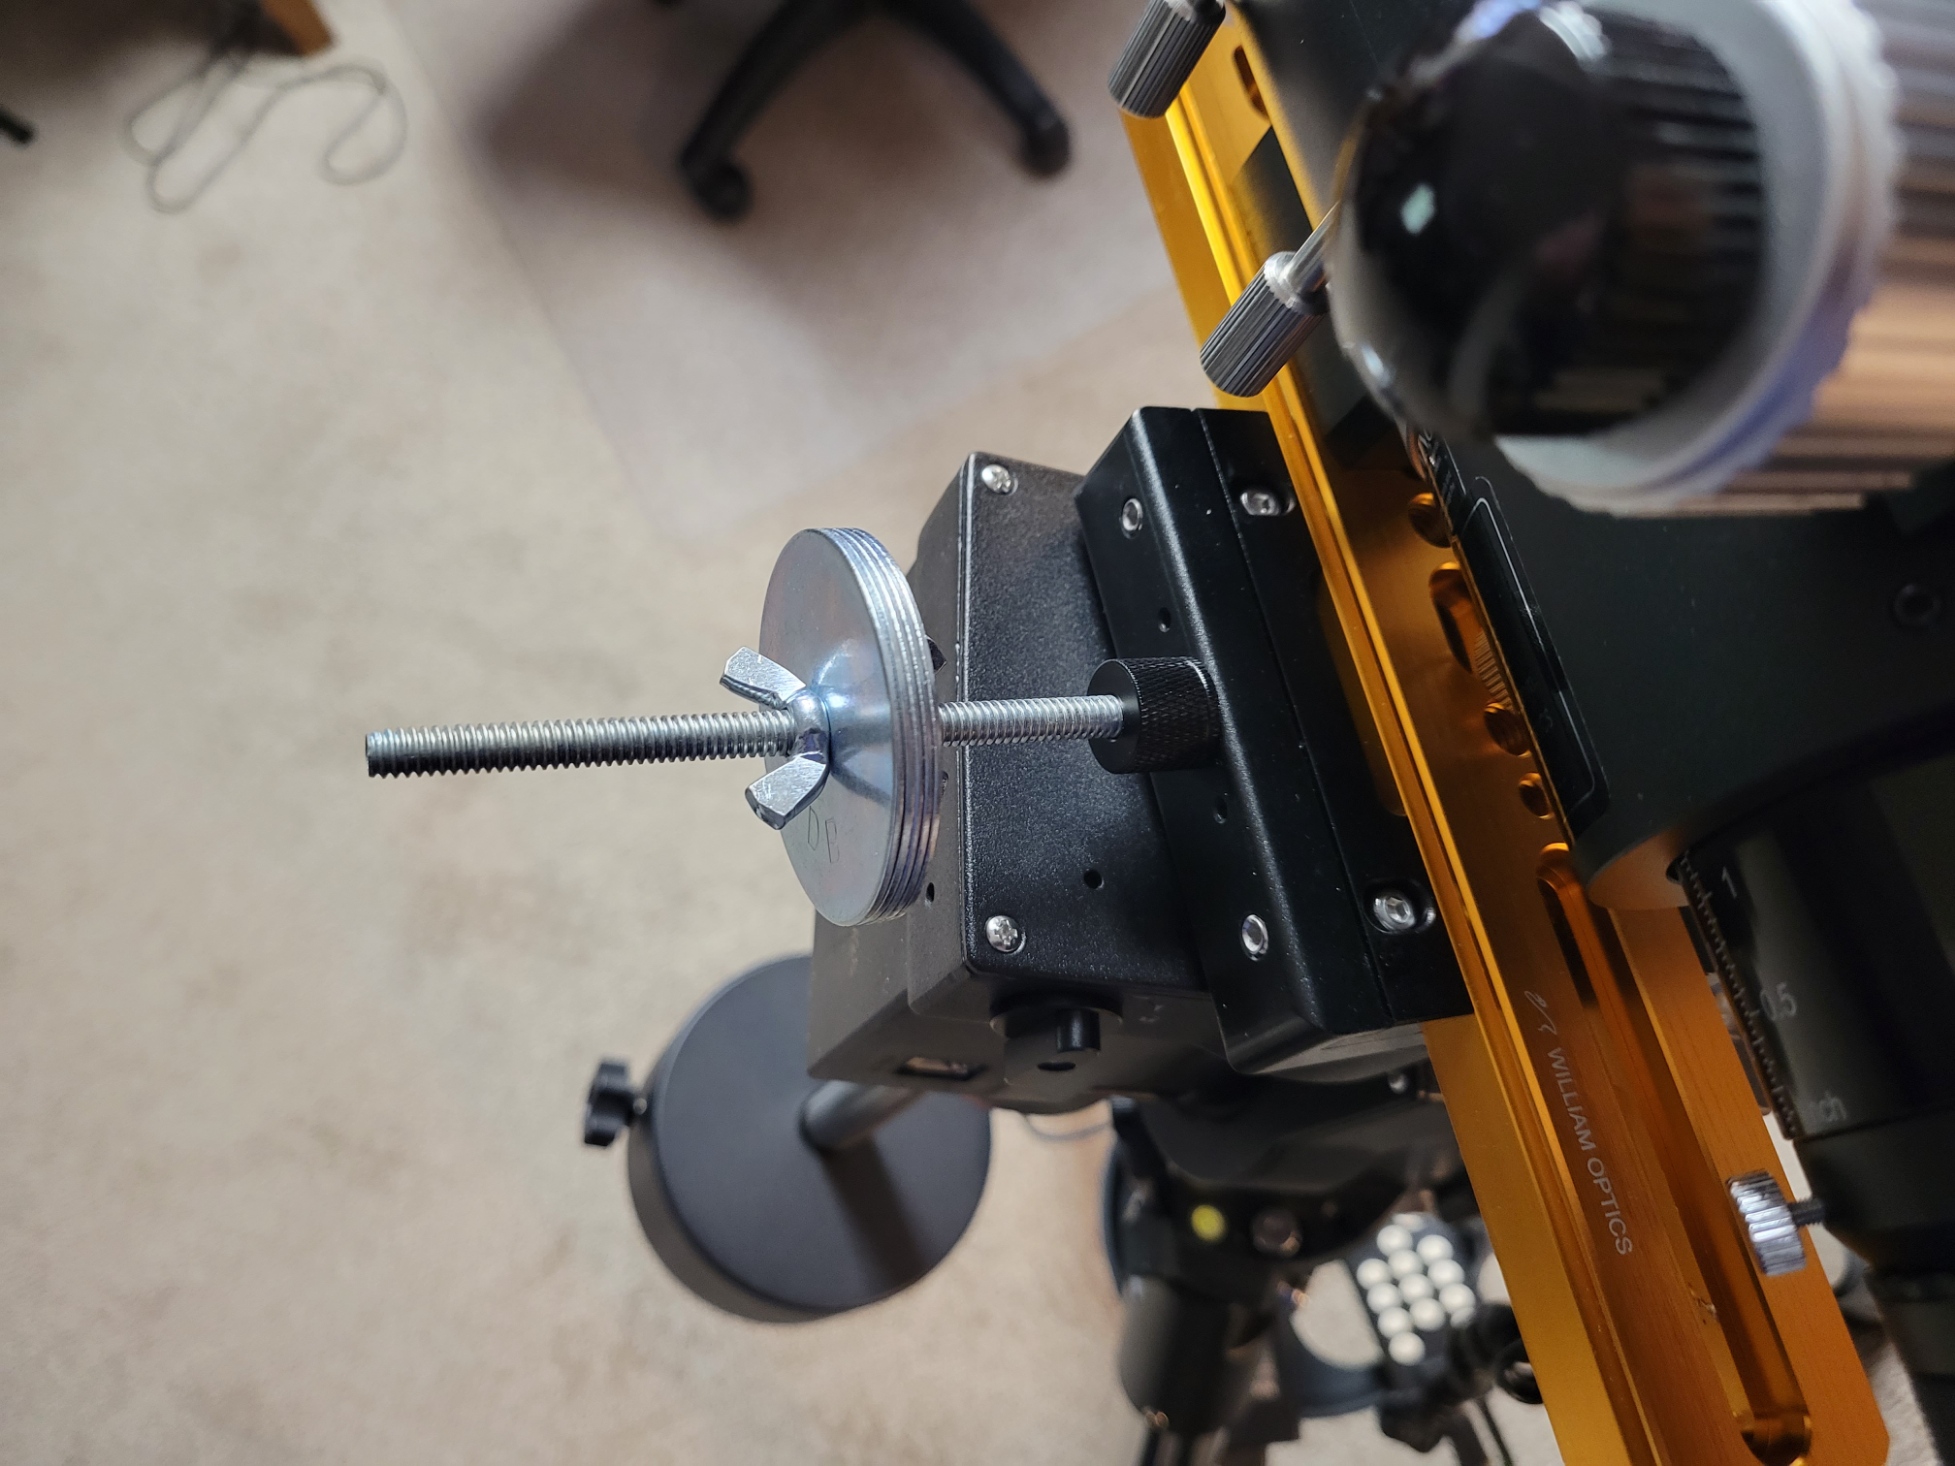
My homebrewed z-axis counterweight for the iOptron GEM28 mount.
iOptron mounts (at least my GEM45 and GEM28 mounts) can be a little finicky balance-wise because they turn so freely and easily on their axes when the locks are disengaged. I’ve found that I get the best performance with these mounts when I balance them in RA and declination and then also on the so-called “z axis”. When I first heard about z-axis balancing I was a bit skeptical and didn’t really understand what it was or why it was important.
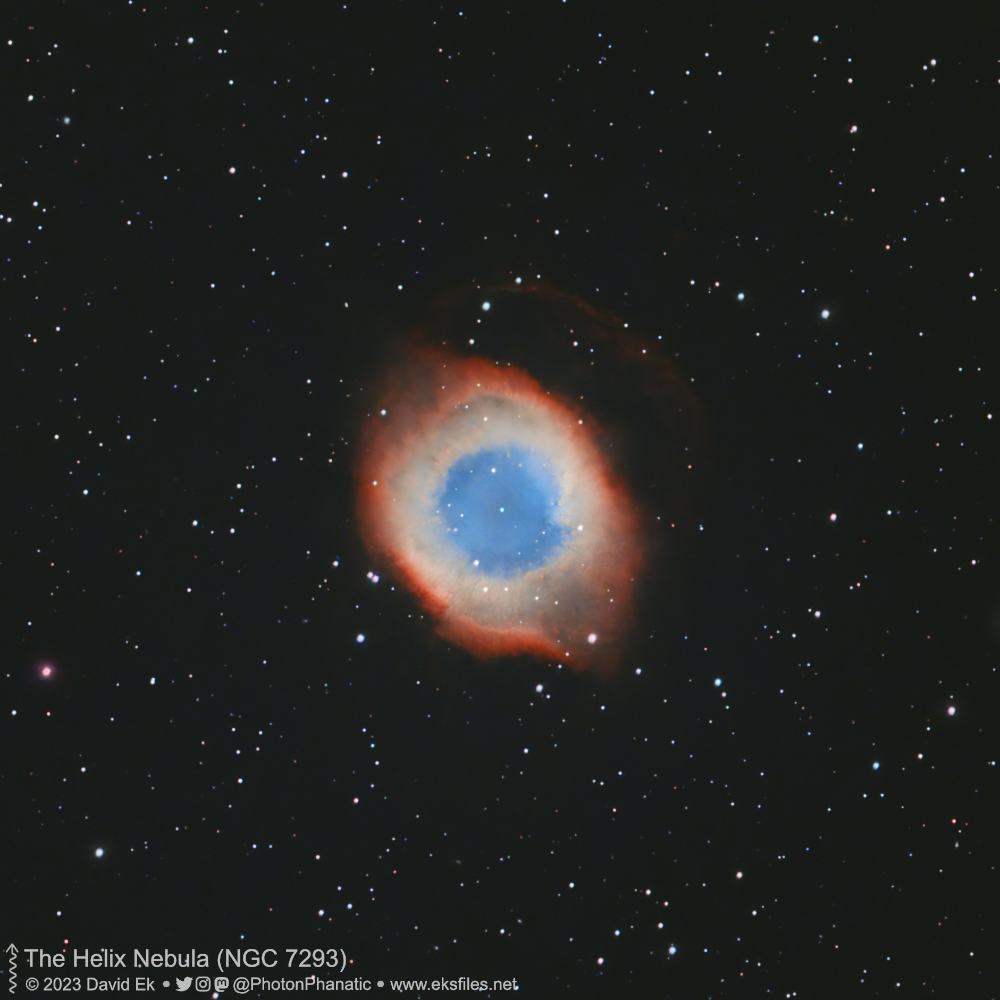
While my C8 was busy last week grabbing photons from the NGC 7331 Group of galaxies, my travel imaging rig was busy staring at the Helix Nebula. This setup, a Sky-Watcher Evolux 82ED refractor (with reducer) on an iOptron GEM28 mount, is quite a bit more portable than my other equipment and is something I can tuck into our RV for travels. I can shoot either mono or color with it, even narrowband. This shot was taken using an Optolong L-eXtreme dual narrow-band filter with an ASI533MC Pro OSC camera. I managed to grab 7.5 hours of 5-minute exposures over two evenings (I can only shoot this target for about 4 hours a night from my location). I processed it in PixInsight and Affinity Photo, but I didn’t try to do any pseudo-Hubble palette this time. It’s not an ideal target for a small refractor but it turned out okay.
The Evolux 82ED seems like a serviceable refractor, although it’s only a doublet. I think the optional 0.9x corrector is really required equipment for imaging, and shooting narrowband helps to hide any remaining flaws. The iOptron GEM28 is a nice little mount. I initially had some intermittent problems with it (it would stop tracking for no reason) but I think a faulty USB cable was to blame. Guiding isn’t perfect but I can generally get 1 arc second or better.
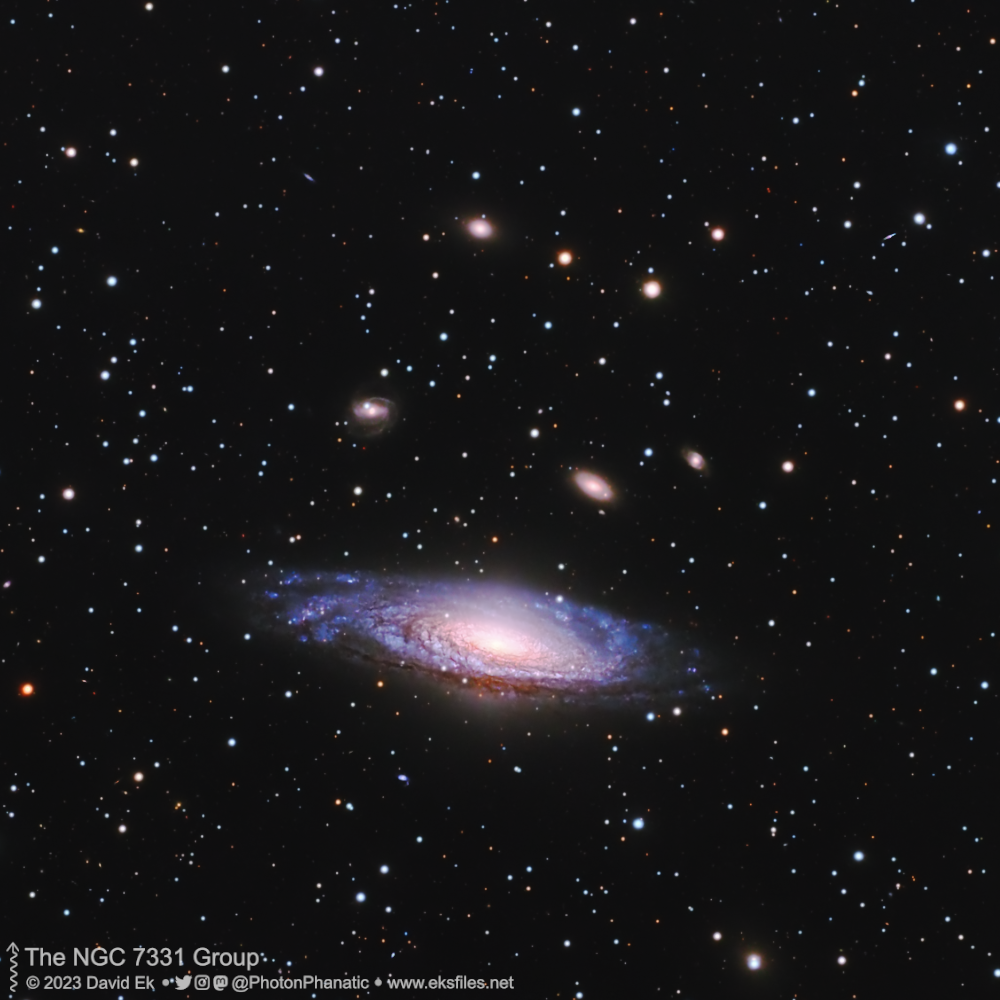
When it looks like we’ll have clear nights with little to no moon, it’s time to set up and shoot some more astrophotographs. Last week we had two such nights, and both nights I had two imaging rigs going at the same time (a bit of a juggle, to be sure). My C8 with Starizona SCT corrector (on my GEM45 mount and concrete pier) was busy capturing this beauty, NGC 7331 and its neighbors, comprising the NGC 7331 Group. I shot this in LRGB using my ASI533MM Pro camera and Optolong LRGB filters. PixInsight and Affinity Photo were used to process the image. I was able to capture about 9 hours of 3-min exposures (31 in red, 26 in green, 31 in blue, and 91 luminance).
My C8 has turned into an astrophotography workhorse for me. I always use the Starizona SCT corrector to get a nice flat field. I find myself using this setup more than I anticipated. I got the C8 OTA as partial payment for some freelance coding work, and at the time I wasn’t sure how much I’d use it. So I’m pleased it’s been so useful for targets like this one. Don’t get me wrong–I still love my refractors, but they specialize in the larger targets. There is no “one telescope to rule them all.”
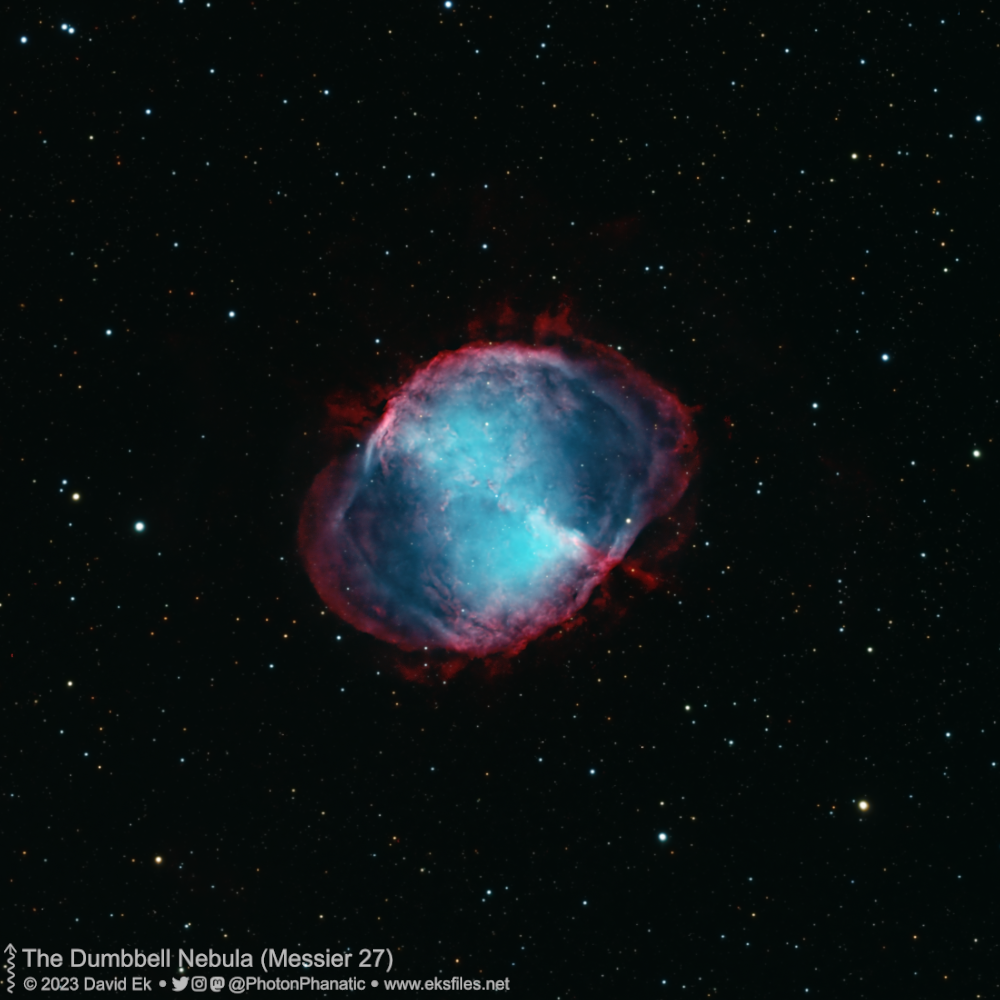
Finally had another clear evening with a dark sky so I fired up the C8 and shot the Dumbbell Nebula, a planetary nebula in the constellation Vulpecula. I shot this in LRGB and Ha using my ASI533MM Pro mono camera. I also used a Starizona SCT reducer/corrector so the net FL was 1469 mm. I’m glad I grabbed some Ha on this target because it really made the red color pop. I captured 14 180-sec subs using the R, G, and B filters, 28 120-sec subs with the L filter, and 14 300-sec subs with the Ha filter. Processed using PixInsight and Affinity Photo.
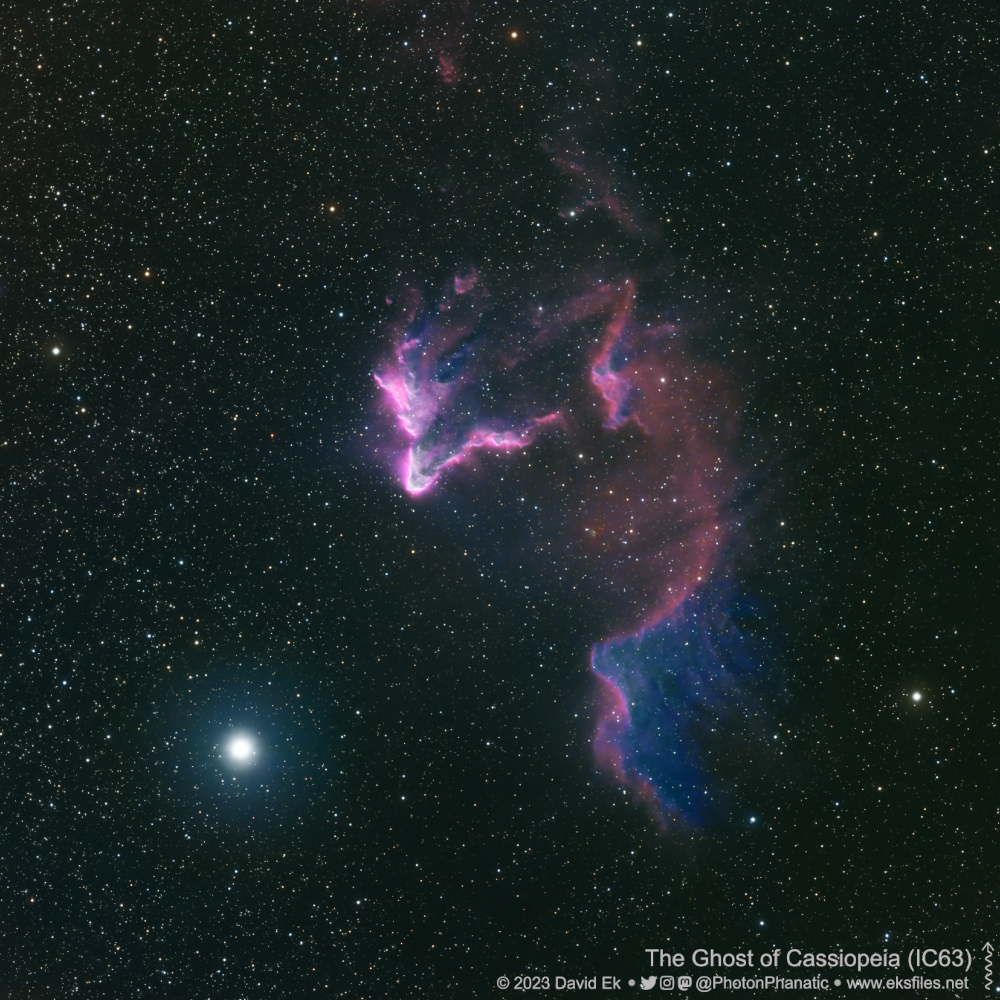
With autumn approaching, the nights are longer and the weather here in the mountains of Colorado gradually yields more clear nights. Combine that with a waning crescent moon, and I had two nights to shoot a new target. This time I shot the Ghost of Cassiopeia (IC 63) with my ZWO ASI533MM Pro camera through my Sky-Watcher Esprit 100 refractor, using L, R, G, B, and Ha filters. This target is a bit challenging to process due to its close proximity to Navi (gamma Cassiopeia). Processed using PixInsight and Affinity Photo. I was able to collect almost 13 hours of data on this target. I took 3-min exposures in L, R, G, and B, and 5-minute exposures in Ha–a total of 39 exposures in R, 38 in G, B, and Ha, and 77 in L.