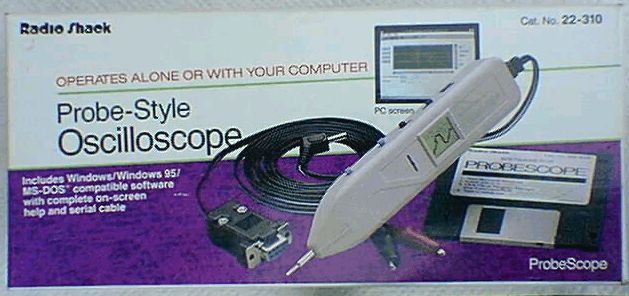
If you’ve been geeking out for a couple decades, chances are you at least saw the Radio Shack ProbeScope at some point in time.

I bought one back in the late ’90s and found it to be fairly handy for a number of things. Its sampling rate, as I recall, was 4MHz, meaning you could use it to at least detect the presence of RF in a circuit. I also used it to help me debug the code I wrote to emulate serial communications in the microcontroller for my Digital Setting Circles project.
The ProbeScope included a floppy disk with software on it for both DOS and Windows that allowed you to view the waveforms on your PC by connecting the ProbeScope to the PC’s serial port. Alas, the software was written back in the 16-bit days and won’t run on the 64-bit operating systems on most modern PCs. Plus, who has a floppy drive to read that disk anymore? But if you’ve read any of my other blog posts, you know I have a habit of finding ways to revive old but still useful technology that’s long since been left behind.
It doesn’t help matters that Radio Shack has essentially gone belly up. My efforts to find the software for download on their support site were fruitless–I couldn’t even launch the site! But all hope is not lost. It’s the Internet Wayback Machine to the rescue! The Internet Wayback Machine is an archive of snapshots of countless websites, allowing you to travel back in time to see those websites as they existed at various times in the past. How cool is that? So even if I can’t find what I need on the current Radio Shack site, I can go back 15 years or so and maybe find it there. With the Wayback Machine’s help, I was able to find a link to Scope41.exe, the setup program for the ProbeScope software. I also was able to find a PDF of the manual.
So, I’ve got the software now. What next? Well, I need someplace to run the software, and I also need a serial port to which I can connect the ProbeScope. The latter is fairly easy to deal with–it’s not hard to find a decent USB-to-serial converter cable these days, or you might even have an older PC with a real serial port. The more challenging part is finding an environment to actually run the software. For that you need to be running an older 32-bit version of Windows (Windows XP or earlier), or the old 16-bit Windows 3.1, or even (gasp) DOS. These things aren’t quite as hard as you might imagine, thanks to virtualization (software emulation of PC hardware). You can, for example, run VMWare Workstation Player (free for personal use) on your PC and then install Windows XP in a virtual machine, giving you a platform on which you can then install the ProbeScope software. Another approach is to use Dosbox, a DOS emulator, to run the Probescope DOS software directly, which I think is the easiest solution to implement.
It doesn’t take a whole lot to get Dosbox up and running–just download it and install it on your PC. When you start Dosbox, you’ll be in a command line environment with a Z:\ prompt facing you. You can use the mount command to tell Dosbox what folder on your hard disk you want it to use as the root C:\ folder within Dosbox. A convenient approach to this is to simply create a folder on your PC to be your dedicated Dosbox C:\ folder, and then tell Dosbox to mount that folder on startup. You can do this using the dosbox config file (accessible from your Start menu under Dosbox-0.74->Dosbox 0.74 Options. This will open a text file which Dosbox reads at startup to configure itself. In that file is a section (towards the bottom) that begins with “[autoexec]”. Add the following lines to that section:
[autoexec]
# Lines in this section will be run at startup.
# You can put your MOUNT lines here.
mount C C:\DosBox
C:
(substituting “C:\DosBox” with whatever folder you created). Then look for another section in the file starting with “[serial]”, and edit the line starting with “serial1=” to look like this (but change “COM6” to whatever com port is assigned to your PC’s serial port or USB-serial cable):
[serial]
serial1=directserial realport:COM6
This tells DosBox that when a program running inside it tries to access COM1, connect it to physical COM port 6. Now save the config file.
Next, create a folder within your DosBox folder named “scope” and copy SCOPE41.EXE (the software for the ProbeScope you downloaded previously) into that folder.
Now start Dosbox. It should automatically start with the DosBox folder as your root folder. Type
c:\> cd scope
to switch to the scope folder, and then type
c:\scope> scope41
This executes SCOPE41.EXE, which is like a self-expanding zip file. It will create all the necessary files needed to run the ProbeScope DOS software. Once it finishes, set up your ProbeScope, plug it in to the PC, and power it up. Then, in DosBox, type the following command:
c:\scope> scopedos
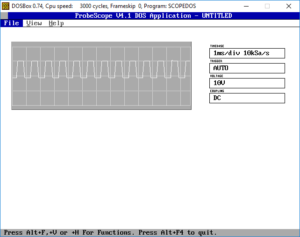
This should start the ProbeScope software, and you should see a screen like this:

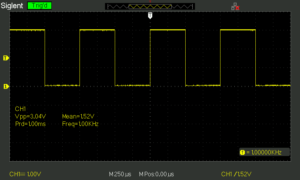
The signal you see is the 1-KHz square wave calibration signal provided by my brand-new Siglent SDS1102CML+ digital storage oscilloscope. :-) Here’s what it looks like on that scope:

